8 Structuring a complex app
So far, we've been mostly structuring our app entirely in the app.R file, apart from some of the web helper files for CSS and JavaScript. However, once your apps start getting relatively complex, you might find it easier to move some of the code into external .R files and using source() to include them. There are a few things to watch out for when you do this.
8.1 External Server Functions
You can define functions you want to use in your app at the top of the app.R file, but that can make that file difficult to parse pretty quickly. The basic template includes external functions with the line:
source("scripts/func.R") # helper functionsThis file contains definitions for the functions debug_msg() and debug_sprintf(). You can add your own custom functions to this file or to another file that you source in separately.
All .R files inside a directory called R will run before the app starts up, even if you don't source them into the app. You can use this to set up any functions your app needs without having to use source(), but I prefer to explicitly include external files, so I keep external functions in a directory called scripts.
8.1.1 Sourcing Locally
It can be tricky to use shiny functions to external files. For example, you can't just move the contents of server() to an external file called scripts/logo.R and source the file in like this:
server <- function(input, output, session) {
    source("scripts/logo.R")
}
You'll get an error like: "Error in output$logo <- renderImage({ : object 'output' not found". This is because the input and output objects only work like you'd expect when they are inside server()
However, you can source in external code inside server() by setting the local argument to TRUE.
server <- function(input, output, session) {
    source("scripts/logo.R", local = TRUE)
}
You might find it useful to break up parts of the server logic for a very big app into separate files like this, but it's more common to keep any code that uses reactive functions inside server() in the app.R file, and move large sections of code inside those functions to externally defined functions.
For example, you could define the function logo_image() in the external file scripts/logo.R like this:
logo_image() <- function() {
  list(src = "www/img/shinyintro.png",
       width = "300px",
       height = "300px",
       alt = "ShinyIntro hex logo")
}
The following in the app.R file keeps the reactive function renderImage() inside server(), but lets you reduce the number of lines of code.
source("scripts/logo.R")

server <- function(input, output, session) {
    source("scripts/logo.R", local = TRUE)
    output$logo <- renderImage(logo_image(), deleteFile = FALSE)
}
8.1.2 Inputs and Outputs
The objects input and output aren't available by default to externally defined functions. Let's add an action button to the ui for our app, actionButton("change", "Change Image"), and change the logo_image() function so that it returns the ShinyIntro logo on odd-numbered clicks of the change button, and the psyTeachR logo on even-numbered clicks.
logo_image <- function() {
  odd_clicks <- input$change%%2 == 1
  src <- ifelse(odd_clicks,
                "www/img/shinyintro.png",
                "www/img/psyteachr.png")

  list(src = src,
       width = "300px",
       height = "300px",
       alt = "ShinyIntro hex logo")
}
If you try to run this, you'll get an error message like, "Error in logo_image: object 'input' not found". This is because the external function doesn't have access to reactive objects like input, output, session, or any reactiveValues().
The best solution is to pass any variables to the function that you need. In some circumstances, you can pass the whole input object, but that's seldom necessary.
Here, we change logo_image() to take a single argument called change and replace input$change with this argument.
logo_image <- function(change) {
  odd_clicks <- change%%2 == 1
  src <- ifelse(odd_clicks,
                "www/img/shinyintro.png",
                "www/img/psyteachr.png")

  list(src = src,
       width = "300px",
       height = "300px",
       alt = "ShinyIntro hex logo")
}
Then we just have to pass the value of input$change to logo_image() inside renderImage(), where the input object is available.
server <- function(input, output, session) {
    output$logo <- renderImage({
        logo_image(input$change)
    }, deleteFile = FALSE)
}
Don't worry too much if this isn't making a lot of sense yet. The main thing I want you to take away from this section is that when you try to move some server code to external files, you might get errors (I frequently do). I hope that will remind you of this lesson and you'll have a better idea about where to start looking for the solution.
8.2 External UI Files
Defining a complex UI can be very challenging. The basic template uses a pattern that I find helpful with apps that have multiple tab items. I assign each tab to an object and then include the tabs of the app in dashboardBody() like this:
tabItems(
    intro_tab,
    questionnaire_tab,
    feedback_tab,
    info_tab
)
For a simple app, you can define the tabs in app.R just before you define the ui. You can do the same for any components of the ui, such as dashboardHeader() or dashboardSidebar(). When the sections start getting complex, you can move them into external files and source them in.
8.2.1 UI Lists
When parts of the UI repeat or can be created programmatically instead of manually, you can use apply() or map() functions to create a list of UI components. It can be a little tricky to figure out how to add a list of components into the UI, but this can be accomplished with do.call().
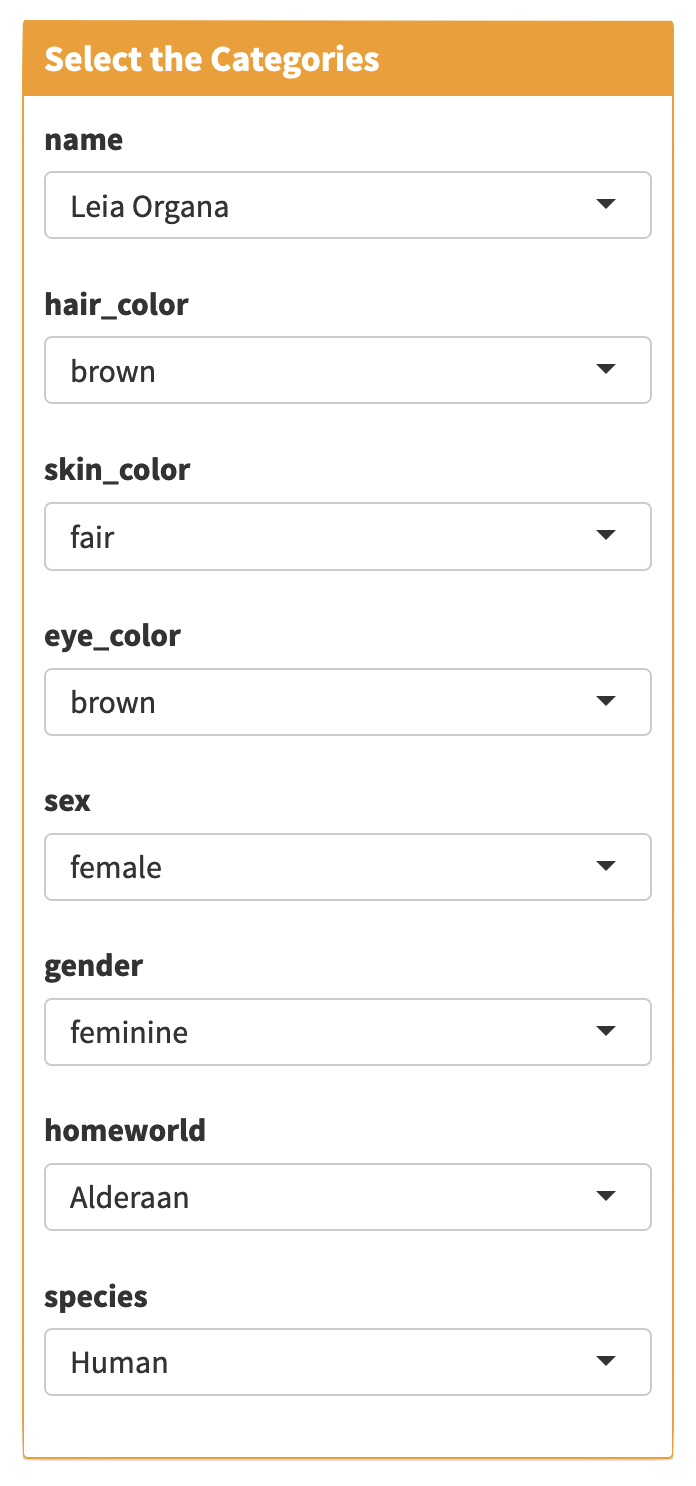
Here's an example of how you would programatically create select inputs for each categorical column of the starwars dataset from dplyr and add them to a box().
# get the categorical columns
col_is_char <- sapply(starwars, is.character)
categorical_cols <- names(starwars)[col_is_char]

# set up the selectInputs
select_inputs <- lapply(categorical_cols, function(col) {
  unique_vals <- unique(starwars[[col]])

  selectInput(inputId = col, label = col, choices = unique_vals)
})

# add container arguments to select_inputs
select_inputs$title = "Select the Categories"
select_inputs$solidHeader = TRUE
select_inputs$width = 4

# add to container
select_box <- do.call(box, select_inputs)